
Please Note: You can easily optimize for V2 using Appearance setting, this guide is tailored for users who has custom CSS from V1 and want to retain it in V2. They will need to use the updated CSS selectors based on the mapping below in order for their previous CSS code to work properly with V2
Introduction
So, you’re looking to hit the ground running with Version 2 (V2), and maybe even shake things up with some custom Decision Trees (DTs)? No worries, we’ve got you covered. This guide is your golden ticket to not only navigate the CSS class modifications from Version 1 (V1) to V2, but also to get a kick out of leveraging the nifty Purecss framework for custom designs.
Assumed Knowledge
Before we dive in, let’s make sure you’re comfortable with the basics of CSS classes and their role in web development. A familiarity with our previous system version (V1) and its CSS architecture is a plus. Lastly, having a basic understanding of HTML and markup languages wouldn’t hurt either!
Objectives
This guide has two primary goals:
- To impart a comprehensive understanding of the CSS class changes from V1 to V2.
- Equip you with the knowledge to craft custom DT designs using the superior architecture of V2 and the power of Purecss.
CSS Changes and Building Your Custom Design
With the shift to V2, we’re welcoming a leaner, meaner CSS structure that significantly amps up the performance and maintainability of our platform. Farewell to the slow page load times of V1, thanks to the farewell we bid to third-party libraries.
V2 strides forward with pure CSS, fast-tracking your page speed, which is absolutely essential for the quick form loading. Now, this new CSS structure is also your playground for creating custom designs with the Purecss framework. Here’s how you do it:
Step 1: Explore Purecss Layouts
Navigate to the Purecss layouts website at https://purecss.io/layouts/ Here, you’ll find a variety of layout templates that you can use as a base for your custom design.

Step 2: Choose a Layout
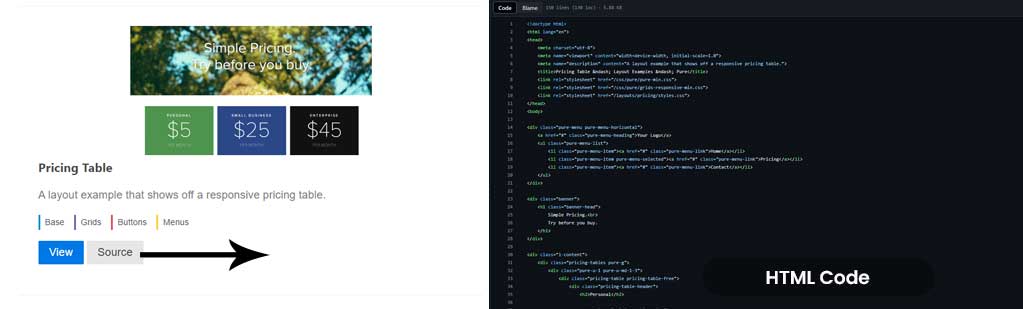
Browse through the available layouts and select one that aligns with your design vision. For example, the Pricing layout https://purecss.io/layouts/pricing/ might be a good start.

Step 3: Clone the HTML Code
Once you’ve selected a layout, clone or copy its HTML code. This is the foundation of your design structure. The “clone” or “copy” option is usually available via right-clicking on the webpage or through the developer tools in your browser.
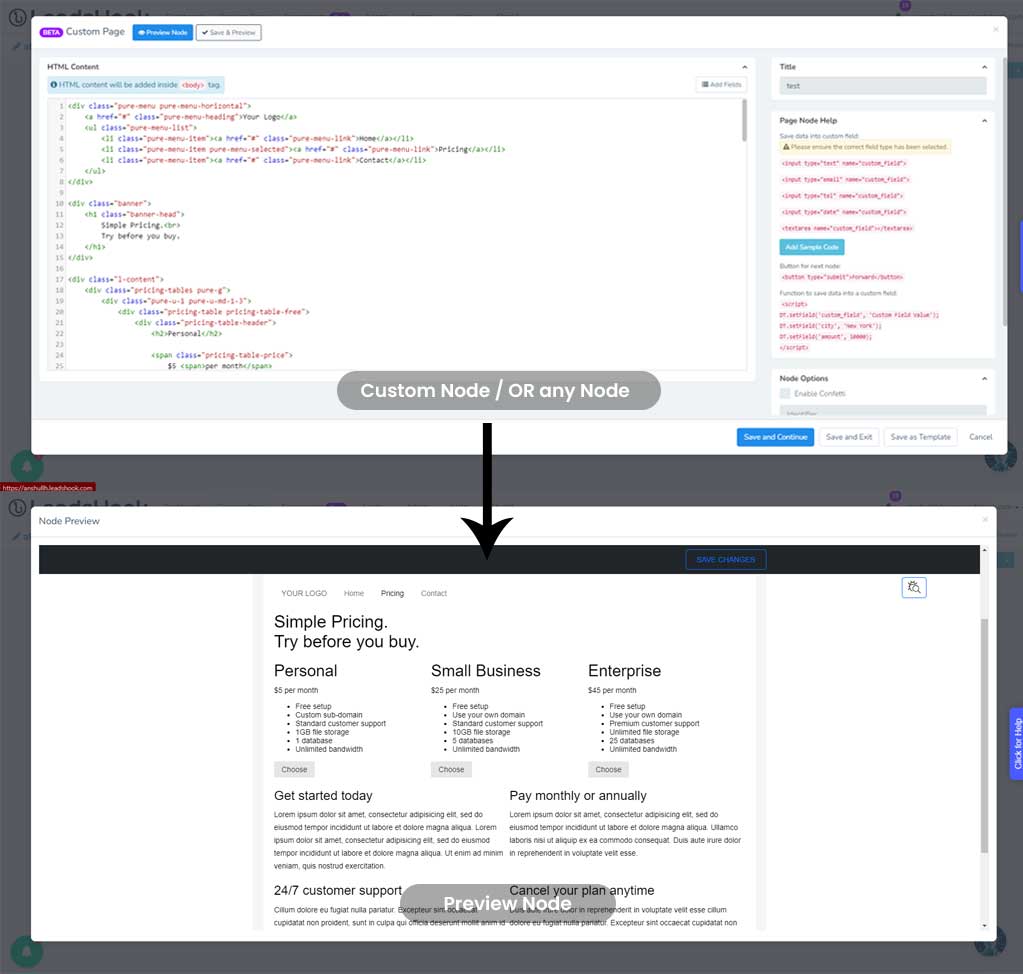
Step 4: Apply the Cloned Code to Your DT Node
Navigate back to your project and paste the copied HTML code onto your DT node. This action will mirror the layout structure on your DT.
Step 5: Customize
With the cloned layout now in place, start customizing according to your requirements. Remember that while the cloned layout provides a good starting point, further refinements and customization will require some knowledge of CSS.
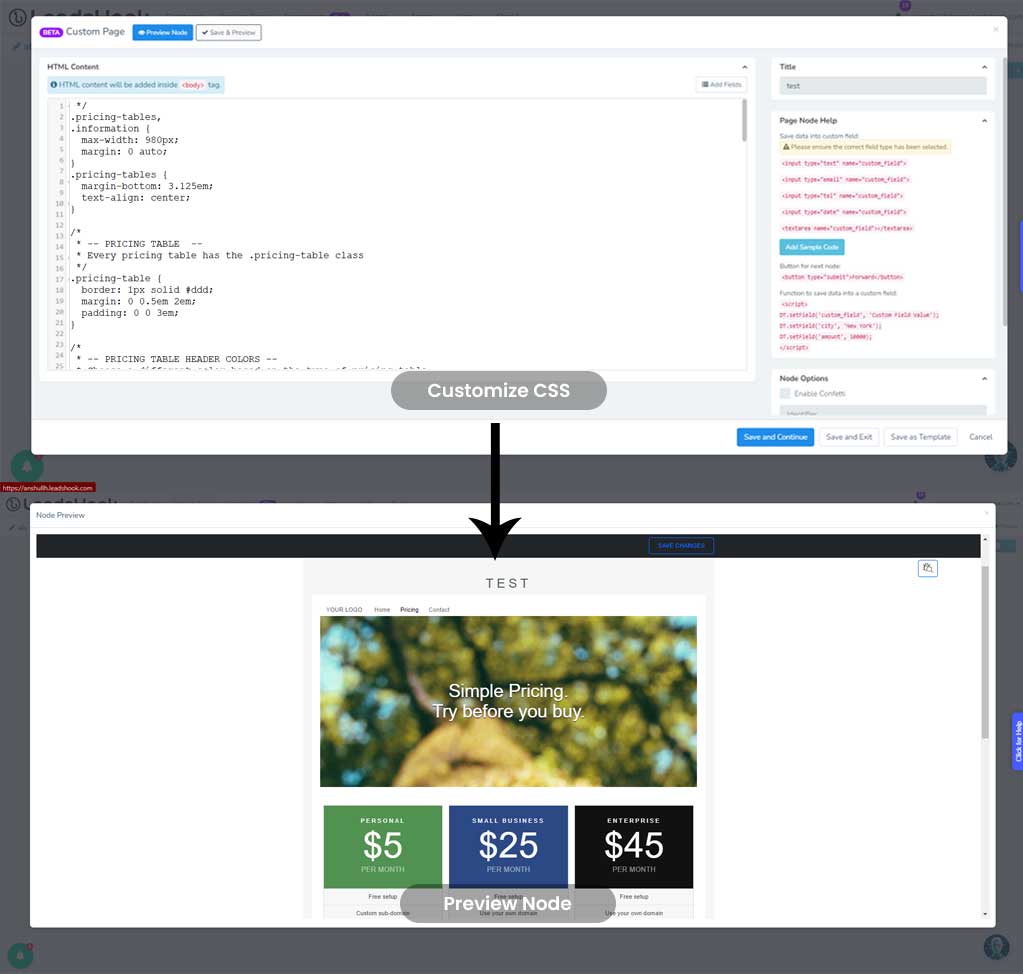
By following these steps, you can swiftly apply a new layout structure to your DT without a deep dive into CSS. For extra shine and finish though, some experimentation and manipulation of CSS will be necessary.
Remember, should you need further assistance or have any questions during the process, don’t hesitate to contact our LeadsHook support team. We’re here to make your transition and design journey as seamless as possible.
Detailed CSS Mapping
| Component | V1 Classes | V2 Classes |
|---|---|---|
| Header | .lh-header .header-logo-center .clearfix |
.header-container .container .header-logo-center-layout |
| Header Logo | .lh-logo (no associated class) | .header-logo .pure-img .header-logo-img |
| Header Menu | UL: .lh-ul-menu LI: .lh-menu-item |
UL: .pure-menu-list .header-menu .header-menu-main LI: .pure-menu-item .header-menu-item |
| Container | .node-well .well |
.node-inner |
| Panel | .panel .panel-default .lh-panel-default |
.node-panel .html-area |
| Form Input | .form-control .question-field |
.form-field .form-control |
| Button | .btn .btn-primary .submit-btn .html-area |
.pure-button .next-btn .pure-button-primary .btn .submit-btn |
| Answer Button | .panel .panel-default .panel-answer |
.question-answer .question-answer-1 |
| Slider (Blank) | .ui-slider ui-slider-horizontal .ui-widget .ui-widget-content, .ui-corner-all |
.noUi-connects |
| Slider (Fill) | .ui-slider-range .ui-widget-header .ui-slider-range-min |
.noUi-origin |
| Slider (Circle) | .ui-slider-handle .ui-state-default .ui-corner-all |
.noUi-handle .noUi-handle-lower |
| Chatbot | .question-line-content | .question-line-inner |
| Progress Bar (Blank) | .ui-progress-bar .progress .progress-striped |
.progress-bar |
| Progress Bar (Fill) | .progress-bar | .progress-bar-inner .progress-bar-striped |
| Footer | .lh-footer .footer-menu-center |
.footer-container .container .footer-menu-center-layout |
| Footer Menu | UL: .lh-ul-menu LI: .lh-menu-item |
UL: .pure-menu-list .footer-menu .footer-menu-main LI: .pure-menu-item .footer-menu-item |
Conclusion
Jumping from V1 to V2 is like unboxing a shiny new toy, one that comes with a revamped, faster, and more maintainable CSS architecture. So, while Purecss helps you assemble the basic structure of your custom DT designs, remember, it’s your personal touch with CSS that will make these designs shine.
Need more help or have a question? Don’t think twice before hitting up our LeadsHook support team. We’re always here to make your design journey as smooth as possible.
Review Summary
This guide is a double whammy – it lays out the path for a seamless transition from V1 to V2 and also arms you with the know-how to create custom designs using the Purecss framework. The language is casual yet insightful, demystifying the technical aspects while keeping the focus on your design goals. The guide also offers a compelling call-to-action for further support, ensuring you’re never left hanging!

